![]()
For our PRO Level Users, you can add products and fixture types within an Active Project itself. Just open up your project and it’s easy to get started!
To Add a Fixture Type:
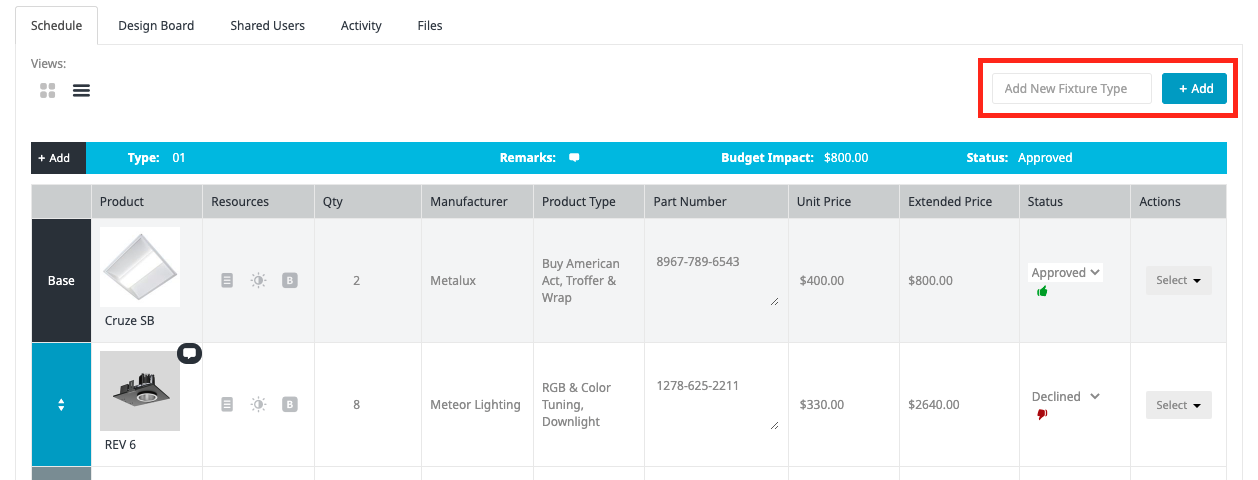
Click within Add New Fixture Type on the top right of your Fixture Schedule, type in the name of your new Fixture Type and select the blue Add button. It’s that simple!
To Add a Product:
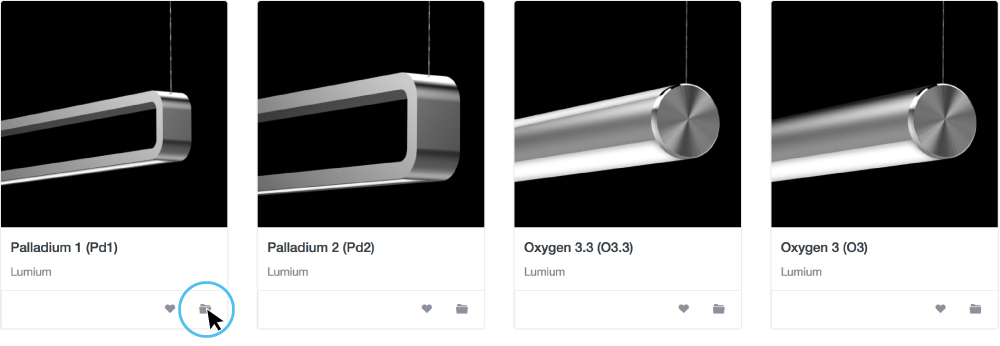
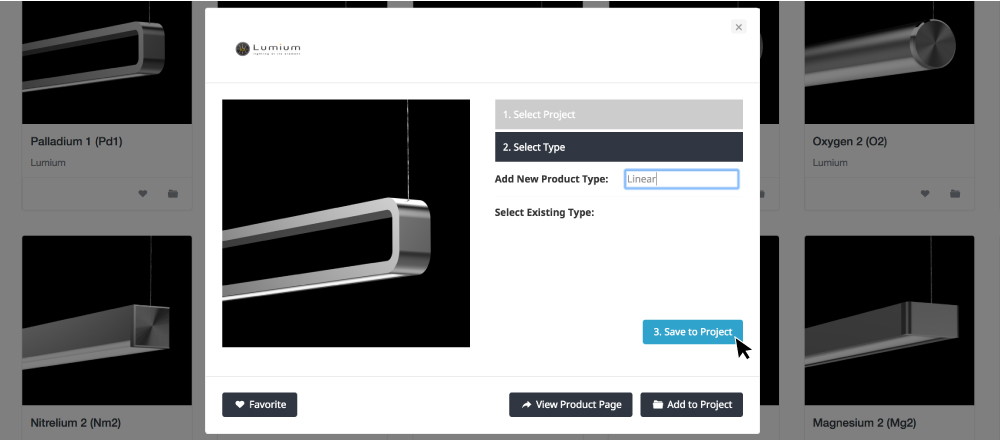
Ready to add a fixture to a schedule? Great…it’s a cinch! Click on the folder in the lower right of the product tile or alternatively, click on the Add to Project button within the product modal.
Next, select an existing project or create a brand new project by adding the project name.
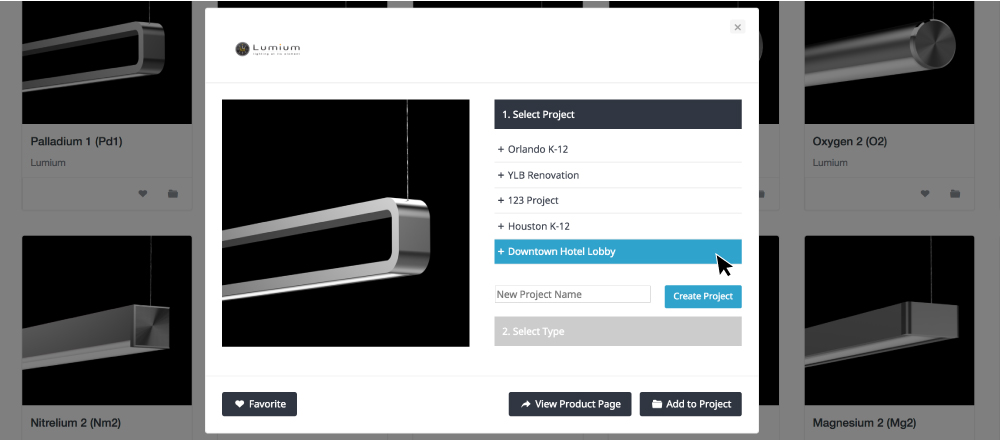
Then, select and existing product type or start a new one. Finally, click Save to Project and choose to continue browsing or review your fixture schedule.
When a fixture is added to a schedule/project, all of its metadata including Name, Description, Product Type, Manufacturer Name, Product Page URL etc. is all saved to the project instantly…so there is no need to copy and paste this information separately! If you need to export your fixture schedule, check out this article.
While you can always add products the traditional way as shown above, if you already know what product you’re wanting to add, you can use the add product button within your project to expedite the process.
Next to each Fixture Type name you will see a black or a red Add button, the button shows red if the Fixture Type has no products yet, and black if it has some already added.

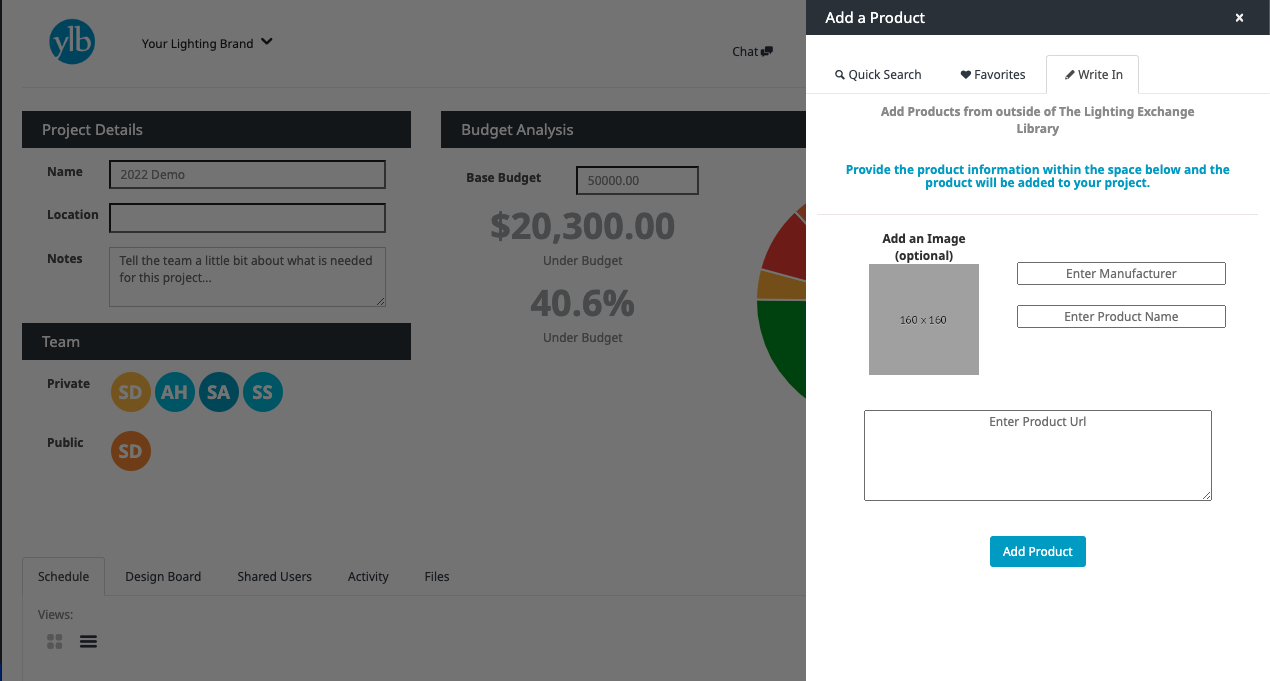
Clicking that Add button opens a side window for you to add a product to that specific Fixture Type. You can add the product via Quick Search, scanning your Favorites, or even a product Write-In!
The Write-In option allows you to add a product if it is not yet listed by your manufacturer on The Lighting Exchange®, or if you are listing a third party product that isn’t made by one of your normally represented manufacturers. You just need to add the Manufacturer Name, Product Name, Product Image and Product URL. If the product is one of your represented manufacturers’ our data team will go in and add the product to the database. Once that’s complete, the product will automatically update for your project. If the product is represented by a third party, our data team will not add it into our data base, but it will still be available for your project collaborators to utilize.
Write-In Image Guidelines:
- 600x600px recommended size
- 4MB Max file size
- JPG is recommended but PNG and GIF will also be accepted
- If you do not add in an image to the write-in product, The Lighting Exchange® logo will populate in its place automatically.